
Photography by George Wong
Vanille Cosplay by DanniTee
This is basic a tutorial on how to use expanding foam on props for those new to prop making or those who want to try out a new medium. Expanding foam is basically foam in a can. It is sprayed out and expands like its name suggests. A can of expanding foam is a very handy material to keep around for cosplayer just as handy as the hot glue gun.
For props that are more curved like such as Vanille’s weapon from Final Fantasy XIII and Soge King’s sling shot from One Piece it is best to use expanding foam for the main part. Expanding foam can be easily cut and carved to the desired shape with a simple cutting knife.
When you decide to use expanding foam as the main medium for your prop the first thing you need to do is draw and cut out your design on to a flat light weighted material such as foam board, corflute, thick cardboard [though thick card board may be difficult to cut normally].
TIP: Draw your design slightly thinner than what is desired. The expanding foam will add to this and make it larger.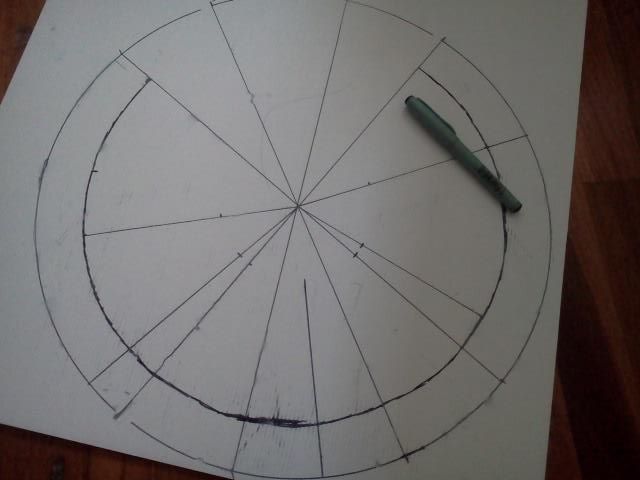
Once your piece is cut out, lay out some newspaper and spray the expanding foam over the design. Cover as much as you can but remember the foam will expand 3 times its original size. Only work on one side at a time. Don’t forget to wear gloves. Expanding foam is difficult to remove off skin if you do not act quickly.
TIP: Keep a bottle of nail polish remover nearby just in case you get some expanding foam on your skin. Nail polish remover will help remove expanding foam if you act quickly.
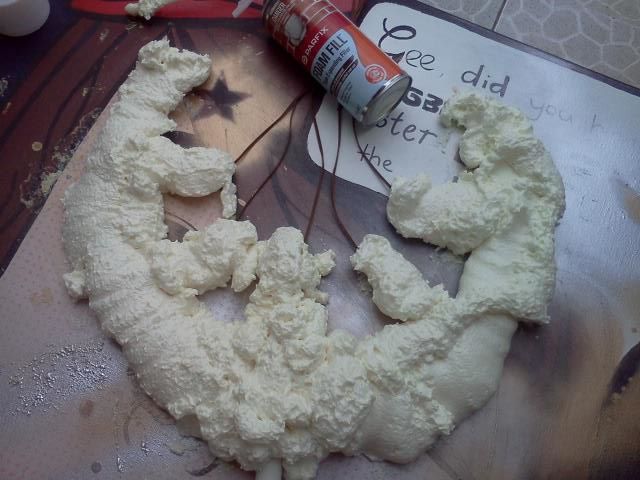
It will take a couple of hours for it to harden but it is best to leave it over night. Once it is completely dried flip it over and spray the other side.
TIP: Lightly spray water over the whole thing. This will make the expanding foam harden faster. It will also give it a smoother surface than usual.
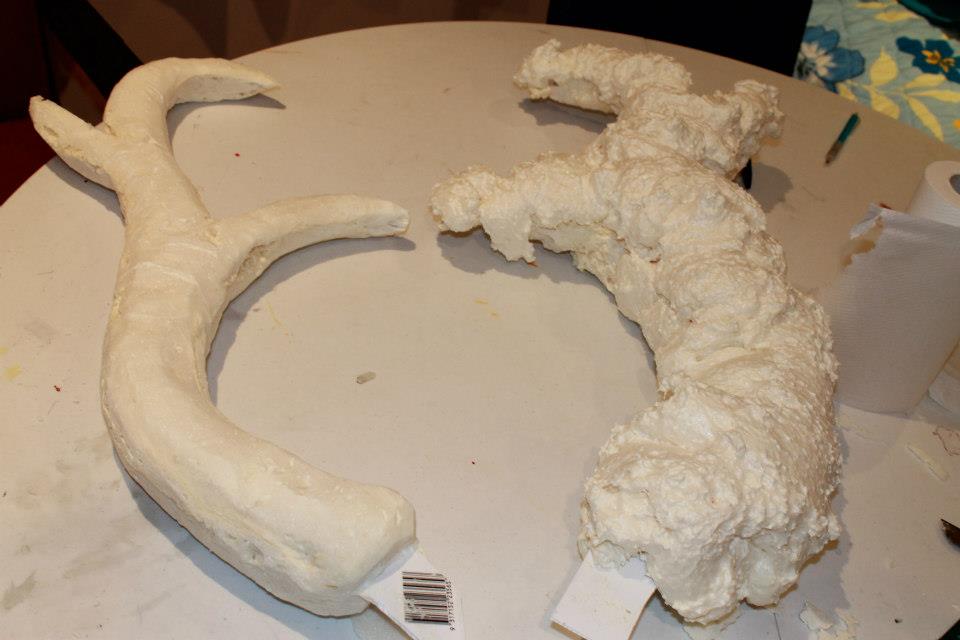
Once both sides have hardened use a utility knife and carve the bumps away for the desired shape. See below for a before and after shot.
TIP: If you are carving and suddenly see that inside is still gooey and honey-like stop immediately and let the foam completely dry. If you continue to pull away at the piece it will create massive holes.
You will notice that there are small holes all over the foam. If you want to cover these holes for a smooth finish, use another medium such as paper mache or paper clay and completely cover the whole piece. Both paper mache and paper clay can be smoothed out with sanding paper for an even more smooth finish. Once that is done, feel free to paint it over with acrylics, spray paint etc.
it is very helpful for me searching on this website!