Cosplay Tutorial-How To Make Macross Frontier Sheryl Nome’s Microphone

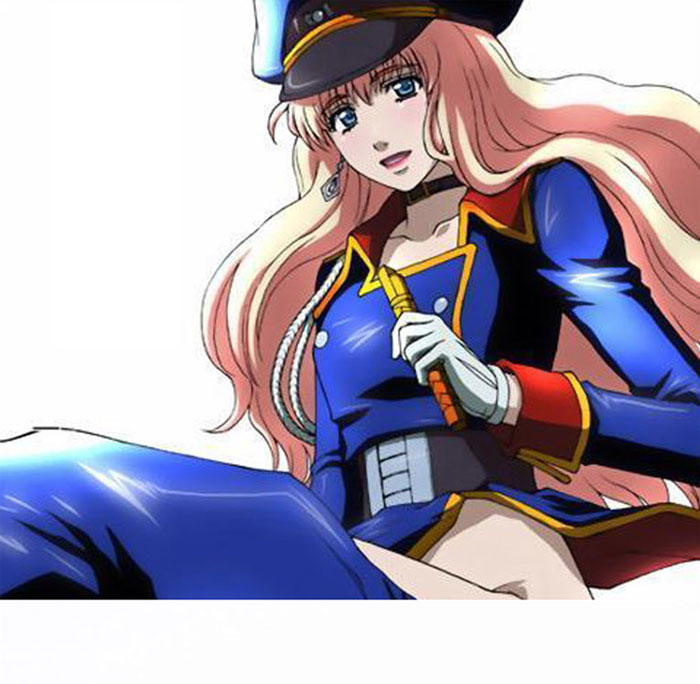
Macross Frontier Sheryl Nome cosplay is really popular, we have blog Sheryl Nome cosplay twice in our blog, you can check it  here and here . Besides Sheryl Nome’s cosplay costumes,maybe you are looking for ideas or tutorials to make the wireless microphone for Sheryl Nome.Just check the original photo below :

Then check the inforgraphic below for tutorials details :

EMBED THE IMAGE Above ON YOUR SITE

Additional resources about making Sheryl Nome’s mic:

How To Make Cosplay Costumes Without Sewing Machine

Have you made cosplay costumes yourself ? I think you may get a problem where can you find a Sewing Machine first to make your costumes. Actually you dont really need a Sewing Machine for making costumes,at least for some easy cosplay . Today we will show you how to make cosplay costumes without sewing machine, not difficult just give a try:

EMBED THE IMAGE Above ON YOUR SITE

Ultimate Bleach Cosplay Tutorials Collection – Pandora Box For Bleach Cosplay

We have talked about how to cosplay naruto before, and provide some good naruto cosplay tutorails. Today we will digg some useful tutorials about bleach cosplay, hope these tutorials will inspire you and just go to diy bleach cosplay yourself.

Bleach Cosplay Accessories tutorials:

Photo from SailorAnime

  1. How to make Bleach Ulquiorra’s Mask
  2. How to make Bleach Yumichika’s Face Feathers
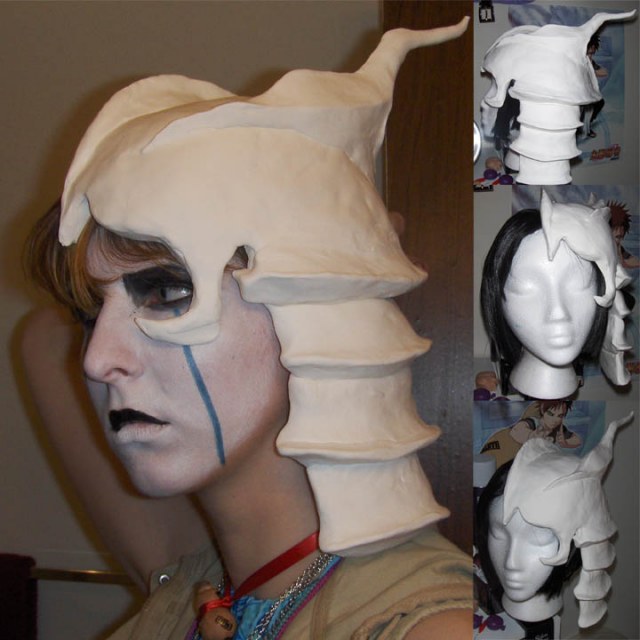
  3. How to make Bleach Hollow Masks

Bleach Cosplay Makeup tutorials:

  1. Bleach Rukia  Cosplay Makeup tutorail : text , video
  2. How to cut and style Bleach Ichigo cosplay wig

Bleach Cosplay Costumes ,wigs and shoes tutorials:

Bleach costumes are almost inspired by traditional Japanese clothing,so the core to make bleach cosplay costumes is learning some basic tips for how to make some basic parts of Japanese clothes

  1. How to make Japanses Hakama : text , video
  2. How to tie an obi
  3. How to make Bleach Szayel Aporro Espada Uniform
  4. How to make Bleach Waraji
  5. How to make Bleach Arrancar boots

Other tips about Bleach Cosplay :

  1. Bleach cosplay tips
  2. Bleach FAQ for all Bleach Costumes

How to Draw Bleach

  1. How to draw Rukia from Bleach
  2. How to draw Bleach Ichigo

How To Make Shoe Covers For Cosplay – Basic Cosplay Shoes Tutorials

EMBED THE IMAGE Above ON YOUR SITE

Text Translate:

Are you still worried about how to make your cosplay shoes cover? If so, you must be delighted while finding helpful tips on shoes covering below. Let’s take my off-white shoes with straps for an example here.

Here is the original style of it.

Tip 1: Cover the shoes by paper with soft texture and draw the shape of the shoes on the paper. Pay attention to the structure of the shoes and decide how many pieces you will cut later.

Tip 2: The back also needs drawing. If you plan to make the sole, also draw the sole please.

Tip 3: Cut the paper and mark where each piece should be placed.

Tip 4: If you plan to also cover the sole, begin to sew the sole now. For a better durability, sew the fabric twice please. Here is the back of the sole.Magnify the back of sole.Here is the front side of the sole, which is next to the floor.

Tip 5: Draw the pattern of the paper-cut on the fabric by chalk. Then, cut it off and cover it on the shoes. Pay attention to this: the edge of the fabric should be wider than the pattern. In this case, it can wrap the shoes inside.

Tip 6: Adhere the fabric with the sole by scotch tape or double faced adhesive tape. Needlework to sew them together will be done later. Thus, just make a temperate modeling here.

Tip 7: Tuck up the spare fabric inwards the shoes. Here, hide the shoe lace around the heel, under the fabric.

Tip 8: A rough seaming pattern is shown here.

Tip 9: Cover and glue the front part of the shoes in the same way. Then, sew the bottom and upper parts together. Be cautious and do not sew the shoes together with the fabric. Besides, pay attention to the tiny alteration on covering or sewing place.

Tip 10: Fabric on the instep is folded inwards the shoes. Be more cautious. Too much fabric folded inside will cause discomfort. And too little fabric will slip off easily. Deal with this carefully.

Tip 11: Make the shoe lace.

Tip 12: Sew the lace onto the shoes. Then, it depends on the circumstance whether Velcro is needed

EMBED THE IMAGE Above ON YOUR SITE

Frequently Used Materials For Cosplay Props or Armors:Cosplay Tutorials

EMBED THE IMAGE Above ON YOUR SITE

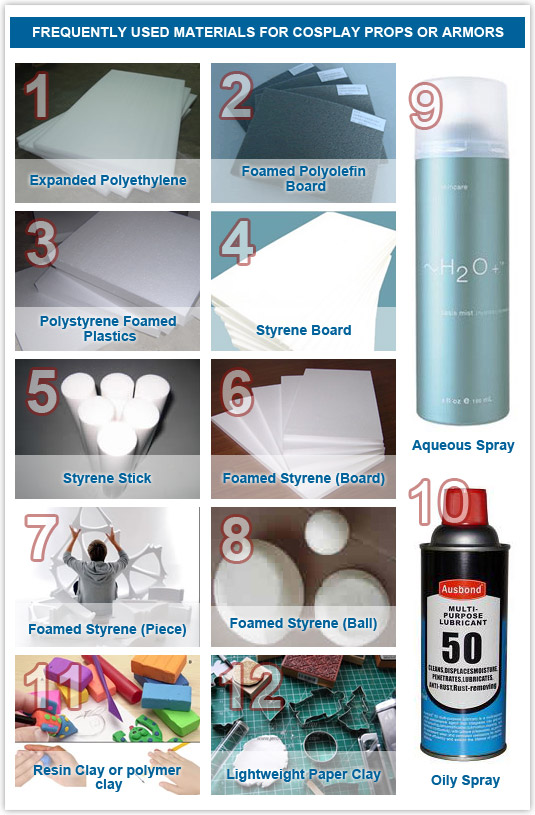
Lots of cosplayers are interested in making their Props,Armors,weapons or some small accessories personally. Then, how should you begin and what do you need? Below, a list of frequently used materials for cosplay is shared with you.

1. Expanded Polyethylene

Slightly harder than urethane foam and used to make the bath mat, expanded polyethylene is widely applied. But because of rough surface that is difficult to be painted, it is usually processed with a sheet above it. Jars or tubes of rubber binder are used, in which G10 best performs.

2. Foamed Polyolefin Board

It can be applied to armor or any other small props. Foamed polyolefin board has exquisite textures, yet excellent practicality and intensity. It’s loved by many cosplayers while making their weapons or accessories. Functional in resist the impact and heat, it can be easily processed by a paper knife or scissor.

3. Polystyrene Foamed Plastics

It can be applied to hard & well-knit armors, weapons, small props, etc. Usually used on swimming practice board, heat insulation sheet and cushioning material, it’s harder than polyolefin board and has fine textures on the surface, which can be easily processed.

4. Styrene Board

It can be applied to thin weapons like knife, sword and small props. When polystyrene foamed plastics are made to be boards, they are hard, lightweight yet rather thin, which are unsuitable while making some thick items.

5. Styrene Stick

It can be applied to thin stick-patterned props like cigarette and accessories on clothes. When polystyrene foamed plastics are made to be stick-pattered, they are lightweight yet less supple, which is not a great choice for making circular items.

6. Foamed Styrene (Board)

It can be applied to any prop if you don’t mind roughness and low durability. It’s cheap and easily processed by paper knife. But rough surface makes it easily torn.

7. Foamed Styrene (Piece)

It can be applied to not only cosplay weapons, small props, but also photographic background, props, etc. Except cube, there are also other shapes looking like protective screens. Color on them is similar with clay.

8. Foamed Styrene (Ball)

It can be best applied on hair accessories, earrings, decorations on clothing, etc. Various sizes and weight are available. Except globular shapes, there are also ovoid and semi-circle patterns, which have a wide application.

9. Aqueous Spray

It can be applied to coating on foamed styrene, plastics, etc. It’s soluble in water before drying. But it becomes waterproof after drying and can be daubed.

10. Oily Spray

It can be applied to coating on ironware, woodwork, etc. It quickly becomes dry and doesn’t drip down. Just pay attention to that oily spray can dissolve foaming styrene and other items.

11. Resin Clay or polymer clay

It can be applied on modeling of plastic components. Clay made from plastic resin becomes supple in hot water. It shapes easily and can be reused after cooling.

12. Lightweight Paper Clay

It can be applied on weapons, small props, components, etc according to coating pattern. Extremely lightweight paper clay can be easily found and modeled. It is the most suitable material for beginners because of can be colored by painting tools. But it has a low durability.

EMBED THE IMAGE Above ON YOUR SITE