How to Make Magical Girl Tomoe Mami’s Long Gun?

After knowing many tutorials on making cosplay props, weapons and costumes, we plan to learn how to make Magical Girl Tomoe Mami’s long gun today. For sure, it’s easy, especially when you have grasped below tips. Now, let’s begin.

This is Tomoe Mami with her gun.

Required tools: scissor, art designing knife.
Materials: EVA (5 mm thick), PVC pipes, foamed board, mighty bond, white latex and automatic spray paint.

1. Draw the desirable size and decorative pattern on the paperboard.

2. Cut off the drawn pattern, which is definitely the pattern on the back part of the gun.

3. Put the paperboard on EVA that’s 5 mm thick and draw all lines. Use scissor or art designing knife to cut out the pattern. I used art designing knife to cut the decorative pattern. For sure, this depends on the skill of your handwork and patience.

4. Draw several under layers that are a little smaller than the decorative board. How small they should be depends on materials you use. Here, EVA is used. But wood or other materials will be different.

5. Stick the baseboard to the outside frame. Remember two baseboards and two frames are needed.

6. Draw the thickness and length of the gun on the paperboard.

7. Likewise, put the paperboard on EVA that’s 5 mm thick and cut out the shape. You can also omit the sixth step and directly cut the pattern on EVA board. After taking the measurement, draw by ruler and cut it off. Then, joint it with the decorative baseboard.

8. An empty box has been finished.

9. Find a PVC pipe and insert it into the box until it reaches the bottom. This pipe is 1 meter long. But how large it should be depends on the size of your box.

10. Cut apart the spearhead. Make details on the gun shaft by EVA that’s 1 mm thick. The front sight is made from foamed board or EVA that’s 5 mm thick. But EVA is much softer than foamed boards.

11. Make the trigger. Foamed board that’s 5 mm chick is adopted. Other materials like EVA with thickness of 5 mm are much softer.

12. Material used to make the trigger is also used to make the driving hammer part. Screw can be used to make the hammer movable.

13. The gun has been roughly finished.

14. When the external form has been completed, it’s time to color. Paint white latex twice on the EVA part. When it dries, begin to color. First paint black ground color. Then, essential color should be made by silver coating.

15. After coloring, it looks like this.

16. The gun is finished.

To make cosplay props will be challenging, yet also interesting. For more information, just pay a visit to Miccostumes.com.

How to Make Vocaloid Magnet’s Dress by Transforming a Cheap Wedding Gown?

It’s an interesting matter to make cosplay props by ourselves. And most costumes or weapons don’t cost us a lot. Below, tips on making Vocaloid Magnet Costume by transforming an amazingly cheap wedding gown are shared with you.

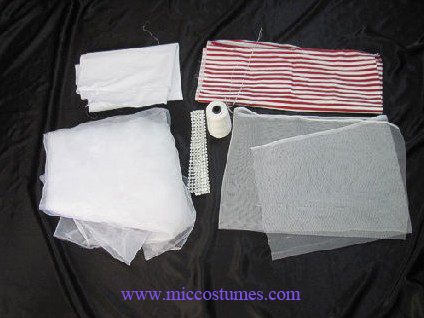
Required items: a cheap wedding dress purchased online, 1 meter of striped cloth, 1 meter of hard lining, 4 meters of organdy or yarn, 1 meter of organza, a roll of white line and a packet of needles. Actually, there will be redundant fabric that can be used to make other things.

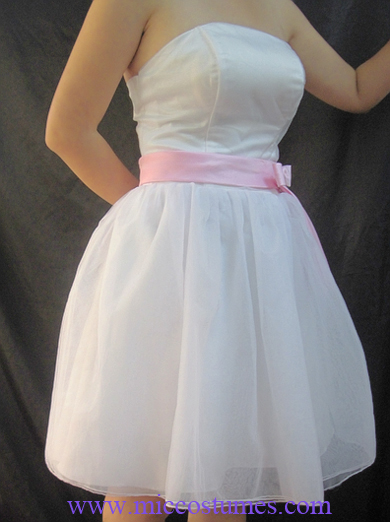
1. Neckline. This photo shows you the wedding dress I bought online. (About cheap wedding dresses, you can check here!) The neckline can be altered. Just cut out the desirable shape and sew it up.

2. Bowknot. Below, you see materials we will use later (the sash has been made in advance. I’ll show you how to make it later).

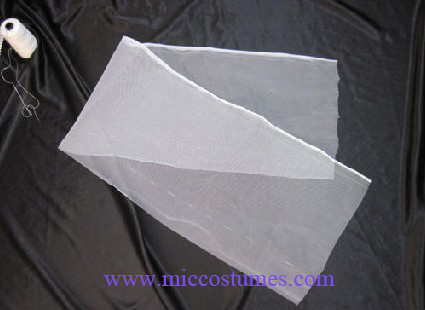
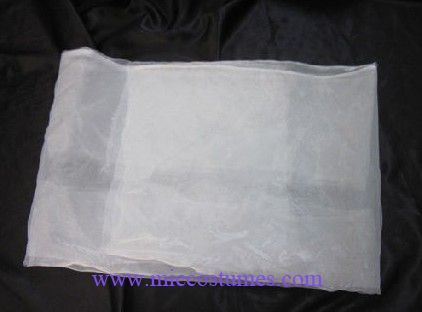
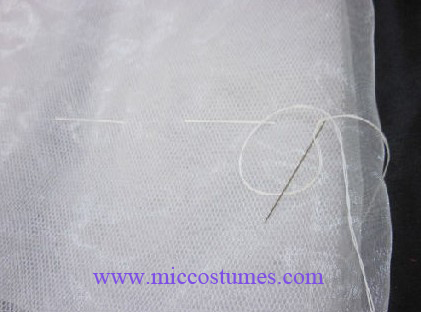
Cut a piece of hard lining that is 1 meter long and 35 CM wide. Then, cut a piece of organdy or yarn that has the same length but double width than the hard lining. Encase the hard lining by organdy and fold it for three times like below picture shows to you.

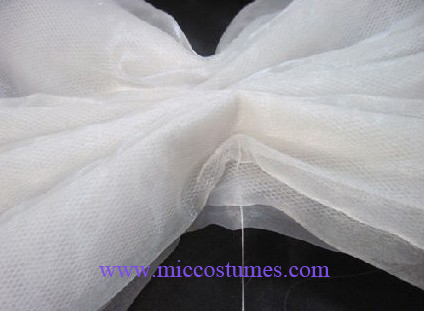
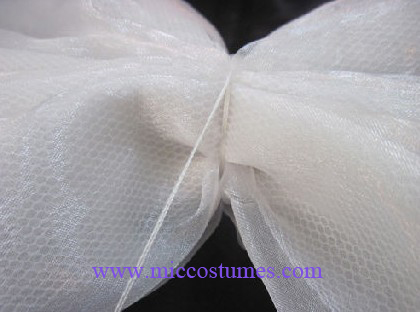
Pinch at the middle of this semi-finished item and sew it by needles. Then, the bowknot is completed. To help it seem more gorgeous, diamond-like sequins are used, which is sold under $2 per meter.

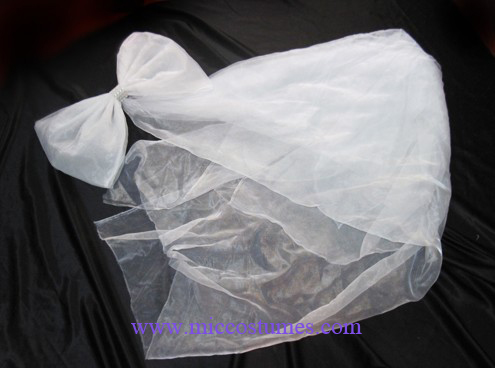
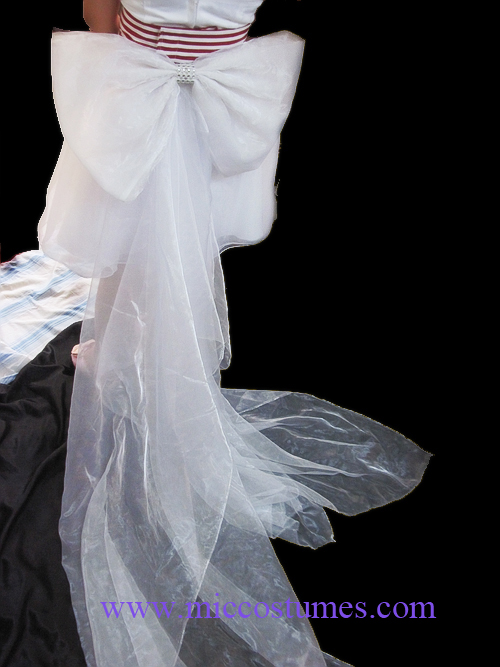
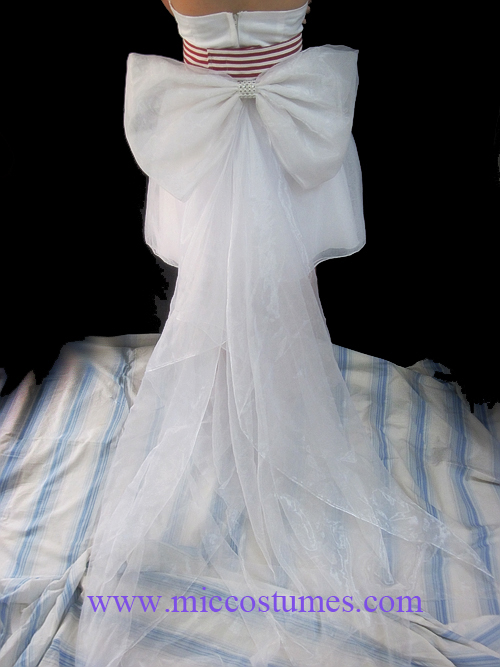
3. Train. It’s very simple. Just find a piece of organza that’s 3 meters long and fold it in the middle. Sew the train together with the bowknot. To enhance the beautiful sense, you can add some lacework on the edge, which only costs you about $2.

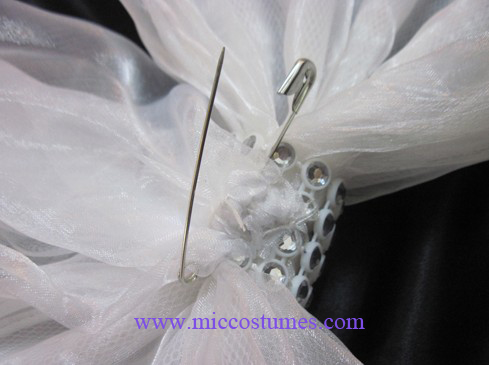
Attach the train, bowknot to the sash by a pin.

The train has been finished.

4. Sash. Method to make the bowknot can be used to make the sash again. First, find a piece of hard lining that is 10 CM wide. The length should be 5 CM larger than your waistline. Striped cloth should be doubly wide and 5 CM longer than the hard lining. In this case, it can be folded inwards. Then, cover the hard lining by striped cloth (if possible, iron it please). Sew them up on all sides and sew the adhesive buttons onto it.

After wearing a sash, the waist seems rather slim \(^o^)/.

The original wedding dress has bra-like undergarment. So don’t worry the dress will not look great because of your small chest. More tutorials can be found on Miccostumes.com.

Cosplayer Interviews-Elffi

Welcome to our cosplayer interviews. Here we are going to do an interview with a Finnish boy, named Elffi. He is also a clarinet player, 23 years old. Addicted to  handcraft from childhood, he enjoys making cosplay stuff and making new friends during cosplaying. Want more information about this amazing boy? Let’s share his story together!

1.Please Introduce yourself first?
Heya! I am Janne “Elffi” Rusanen from Finland and I’m 23 years old.
After my first trip to Japan (winter 2006-2007) I spent a year doing my service in the Finnish Defence Forces Conscript Band playing a clarinet. Currently I live in Vaasa and study Japanese language and culture at University of Stockholm.
I’m making cosplays as a hobby when I’v got some free time. My others hobbies are classical singing and footbag.

2.What does cosplay mean to you?
I’v always loved handcrafts since childhood. It’s a great hobby which teaches you a lot of new things. It’s also a great way to meet new wonderful people and make new friends. I especially enjoy making props.
It’s always wonderful to have a proper photoshoot and take hundreds of photos with a good background and poses. I also have to keep my body in a good shape, that’s why I love cosplay!

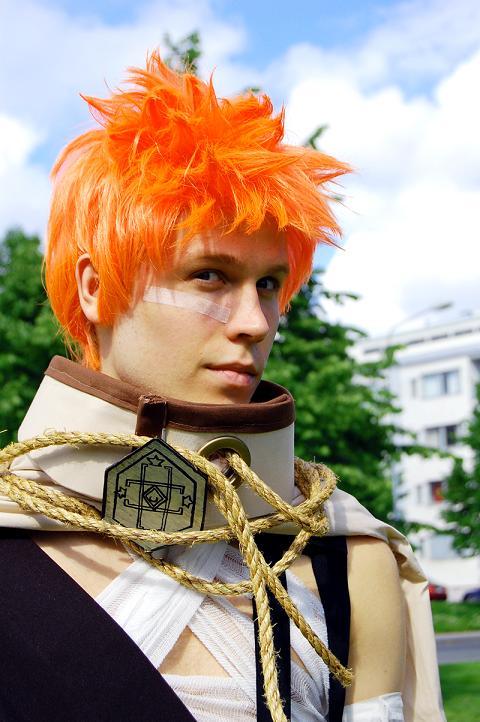
Elffi as Ichigo

3.What was your first cosplay?
My first cosplay was Kurosaki Ichigo in a shinigami costume. It was year 2006. I didn’t know anything about wigs so I just used my own hair. And I made the prop out of cardboard… It was way too small.

4.Does your family supports your cosplay?
I think they all like it a lot. It’s a bit rare hobby for a male, but they understand it. I’v also received some funding for my new costumes.

5. What is your most memorable cosplay experience?
Umm, maybe last winter when we won the WCS (World Cosplay Summit) preliminaries of Finland with my cosplay partner Shufu.

6. What are your 2011 cosplay plans?
I’m making 3 new costumes for the WCS Finals (Nagoya, Japan, in August)
Last weekend I made the first costume. Final Getsuga Tenshou Ichigo from Bleach.

7.Do you make your costumes yourself or buy them ?
I’m making everything by myself. It’s always fun to think new ways and methods on how to make something.

8. Any other cosplayers you like?
I dunno if anyone knows this one guy named farmer-bootoshysa on Deviantart. His costumes are absolutely amazing!
He might be the only one I adore.

9. Do some changes happen to you after cosplay?
Well, I always learn new things, that’s the best part I think.

10. Any advices you wanna share with cosplay newbies?
Please remember, that you can try and use any material in the world when making a cosplay.
Everything is accepted if it looks good! That’s a hard thing to remember sometimes.
Always think twice on what you are doing!

Cosplayer Interviews-Yunie

Today I’m glad to have Yunie here. She is an experienced cosplayer who has cosplayed for ten years. Thanks Yunie for joining our cosplayers interview program. Ok, come and share her cosplay experience.

1. Please introduce yourself first!
My name’s Yunie, and I’m a cosplayer from Colorado. I’ve been cosplaying for ten years as of this September. I’m a history nerd, a gamer, and should probably stop collecting so many horror movies, heh! I own Cosplay Blog… with a Brain!, a cosplay blog, obviously. I also own my own cosplay site Engi no Shouzoku!, which I run with several friends of mine.

2. What does cosplay mean to you?
Cosplay is a basically costuming, which I enjoy for the creative aspects. My inner attention enjoys creating something that people want to get photos of. It’s been a way for me to make friends, express myself, and all around have fun!

3. What and when was your first cosplay?
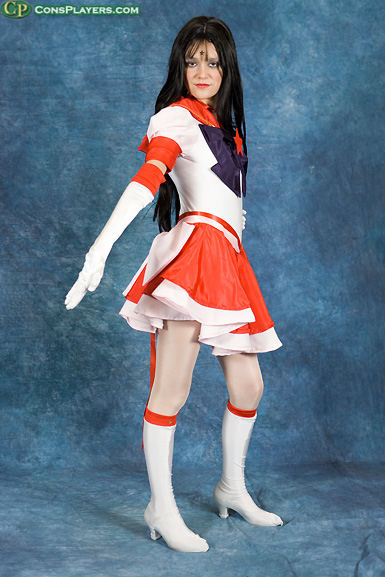
My first cosplay was September of 2001 at Nan Desu Kan in Denver, Colorado. I made Mistress 9 from Sailor Moon with help from my mom. We sewed the top together and added the pearls, found a wig and the star, and purchased the skirt from Goodwill. 😀
4. Does your family support your cosplay?
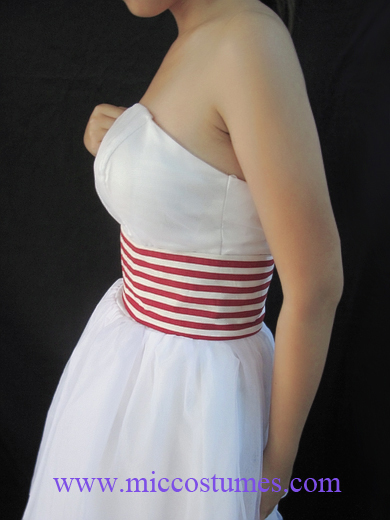
To an extent, they support me. They like seeing what I create and that I’m having fun with it, but they view it as a waste of money. My dad also thinks that traveling is stupid and is almost paranoid about planes, but only when I’m flying on them.
5. What is your most memorable cosplay experience?
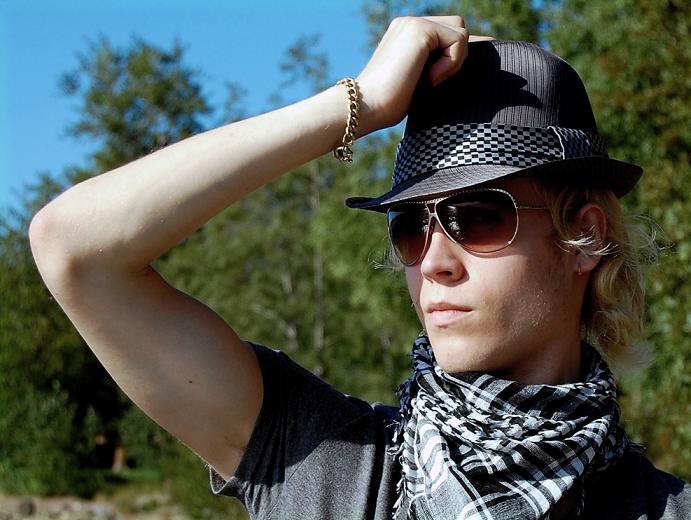
My most memorable by far was when I dressed as Sailor Moon from Pretty Guardian Sailor Moon for Anime Oasis in Boise, Idaho. I had this adorable little girl come running up and she was just absolutely thrilled there was a Sailor Moon there because there was a lot of bad guys and we needed to defeat them. So, we went around the con defeating the bad guys until she had to leave with her parents. It was fun and something I won’t forget.

6. What are your 2011 cosplay plans?
On my list to wear this year are Phoenix from X-Men, Princess Serenity from Sailor Moon, Dark Sakura from Fate/Stay Night, Rinoa from Final Fantasy VIII, Rydia from Final Fantasy IV, and Armitage from Armitage III. Currently, I’m not planning on making anything new due to money restrictions, but that could change.

7. Do you make costumes yourself or buy them?
I usually make costumes myself, but I have bought a few here and there. I always make it clear which ones are bought and never compete in them.

8. Any other cosplayers you like?
There’re tons of other cosplayers I like and many I admire for their work. One I tend to work with the most is Etaru, who is basically like my sister from another mother. <3 I also have the other cosplayers from my website and they’re all like a second family. There’s also Seiya Kou and Yaten Kou, both also in Colorado with me, and I adore them as well.

9. Do some changes happen to you after cosplay?
Kind of? I become more confident when I’m in costume and remain so for awhile afterwards. I have rather low self esteem, so when I cosplay, it gives me a boost. I also get depressed after con for a day or two, because I miss everyone I got to meet and hang out with, but it always passes. I also don’t want to sew for a month or two, heh!

10. Any advice you wanna share with cosplay newbies?
If you’re getting into cosplay, always start out on something easy and work your way up. The more comfortable you get in creating the simpler things, the easier it gets to make more difficult projects. And always wear make-up if you’re planning on being photographed, male or female. You will always look better, even if it’s just some light foundation.

How to Make You an Outstanding Street Fighter Chun Li Cosplayer?

With helpful, yet easy tips on how to make accessories on street fighter Chun Li cosplay costume and photographing, everybody can show an excellent Chun Li cosplay performance. Now, let’s begin.

Step 1: Find Chun Li Cosplay Costume.

As a hot game character, Chun Li cosplay costume will be easy to be found. For a better fitting, most dealers can customize the suit for you. I found an ideal outfit from Japanese brand of Omosirokurabu, on which decorative patterns and cut are both well done and the price is rather reasonable. But the question is that an imitated electroplating color is used on the suit. What I really want to find is a plated Chun Li cosplay costume. Then, I plan to make some alterations on the suit.

Step 2: Make Buns on the Head.

Buns on Chun Li’s head are divided into two styles: gilt-edged and non gilt-edged.

To fit the texture on the costume, brightly silver cloth is chosen here, which is often used on ecopelle parts of stage costumes.

Paillettes, which are golden enough, are sewed to make gold plaques on the edge.

Sewing will be troublesome because you need to contact pin from the middle hole of the rope. Besides, twist it twice to ensure the thickness.

Step 3: Make the Bracelet.

This is a crucial element.

Foaming rubber is used to make the bracelet. It’s waterproof and heat-preserving, which can be found on decoration material market. First, make two basic circles.

Fix them by mighty bond.

Closed angle is made like this.

Glue it.

Round off the edge.

Repeat above steps and make several closed angles.

Then, the basic bracelet is finished.

Black acrylic paint from Winsor & Newton is used to paint the bracelet body.

Closed angles are painted by silver spray paint. To strengthen the electroplating color, plating paint is used, which is also called as mirror paint or chrome-plated paint.

Then the bracelet has been finished. Certainly, it feels rather rough and needs meticulous processing.

Try it on.

Step 4: Make the Silk Stockings.

Obviously, Chun Li wears dark colored silk stockings. But plain silk stockings will expose the strengthened part on the waist because of high split on the cheongsam. In this case, color division will be shown. Thus, it’s a must to choose specialized T silk stockings to cover the strengthened part.

Above pictures show you brown and black silk stockings. But if your thigh width is about 60CM, the brown color will be stretched and become less brown. Thus, black should be better.

Step 5: Make the Boots.

To move freely and ensured a low cost, just buy a pair of white Martin boots.

Change the black shoelaces to be white. Make buckle fasteners on the top line and shoes tongue shown on above picture by EVA. Holes to stringing can be fixed by a small hammer. Finally, paint the plating paint.

Then, all accessories have been completed. Here is the whole look, without being processed by PS.

Step 6: Photographing and Later Stage

First, photographers shoot various kicking movements. Deal with spots and drapes on the backdrop.

Enhance the brightness and contrast.

Adjust the color on the backdrop.

Draw the required speed lines and ink parts by PS.

Adjust speed lines that connect with the cosplayer and vignette some of them.

Then, the final photo looks like this.

Having known how to make accessories on Street Fighter Chun Li costume and taking photos, you must have a good time on the coming show.

EMBED THE IMAGE Above ON YOUR SITE