5 Ways To Make Sailor Moon Cosplay Star Wand and Crescent Wand

Here I’ve collected several ways to make a Sailor Moon cosplay wand, you may find one that you like.

Method One

Color printing: This is the most direct and simple way which is completely suitable for people who are not very good at handwork. You only need to print the accessories on the right parts of the following pictures by color printing. Cut each part of the wand and stick them together. A sailor moon wand made of paper is finished.

Advantage: simple, easy and quick.

Disadvantage: not very stereoscopic and vivid.

Color printing

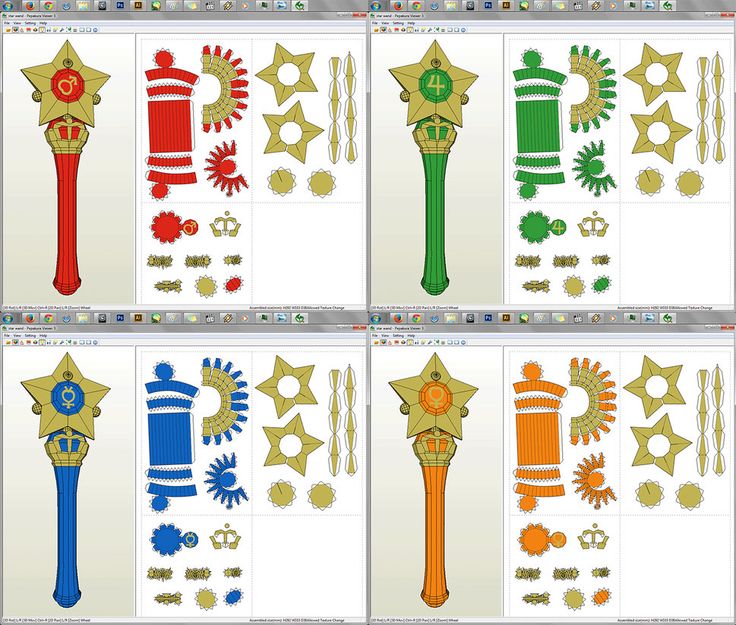
Picture found on deviantart.com

Method Two

If you would like to make a wand more stereoscopic than color printing, you can use 3D paper to make the wand. Of course it will be a little more difficult than the first method.

(1). Make a star as the following process by 3D paper, and draw the color and patterns as in Sailor Moon with paints.

(2). Roll a 3D paper to the shape of a cylinder as the bar of the wand and draw the color and patterns.

(3). Stick each part together with super glue.

3D paper

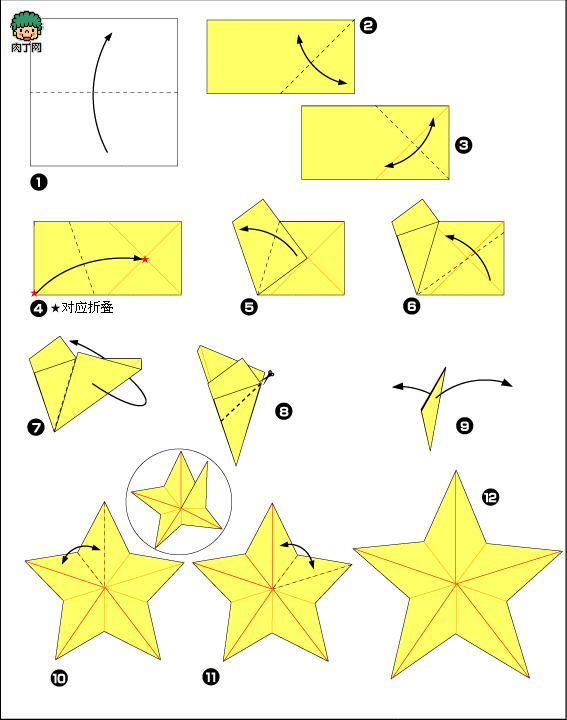
Picture found on rouding.com

Method Three

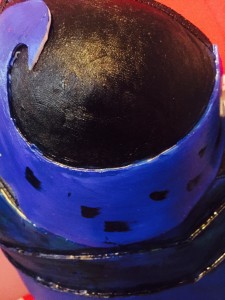
Use polymer clay and wood to make the wand. By this method you can make a completely stereoscopic wand.

Materials: (a). Part of Wood: a cylindrical wood, 4 wood balls (including one biggest, one smaller and two smallest balls), 2 heart-shaped wood (one of which is a bit smaller than the other one). (b). Part of Clay: a small bottle of polymer clay. (c). A utility knife. (d). A pair of disposable gloves. (e). Super glue.

Process: (1). Use the utility knife to cut the clay into the shape of a star, curve a smaller star along its edge. (2). Knead 5 tiny balls on the top of the 5 angles. The sixth angle is excluded because it will be jointed to the main part of the wand. (3). Poke holes at the positions shown in the above right picture. The size of the holes must fit the dowels. (4). Apply super glue on the dowels and insert the dowels into the holes to joint each part together. After the clay become dry, the wand is finished. Of course you can color it as in Sailor Moon.

polymer clay

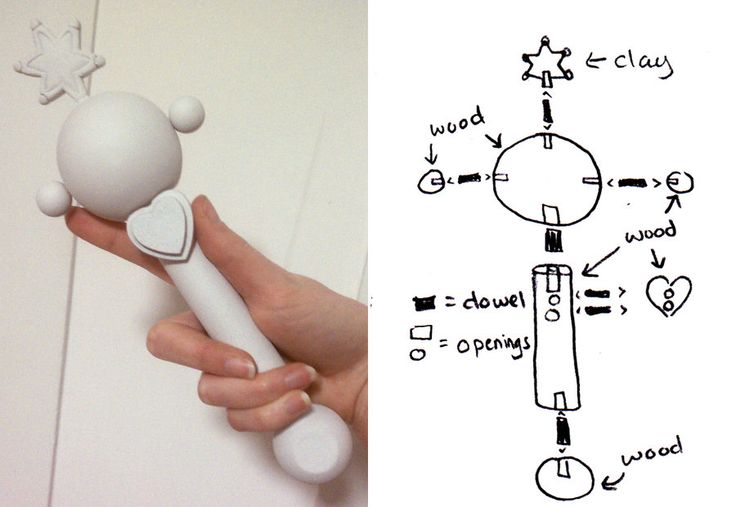
Picture found on pinterest.com

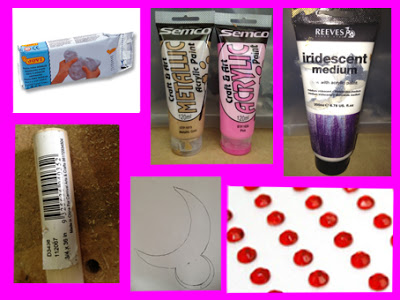
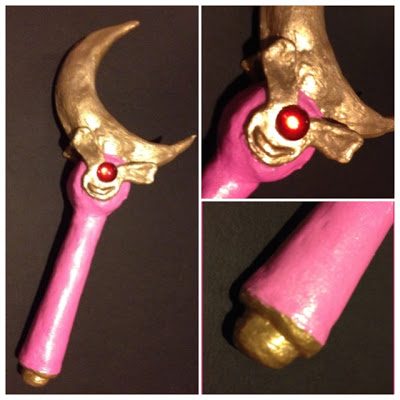
Method Four (Adapted from the article by Jellybean)

If you are quite good at handwork, the following steps of making a Sailor Moon’s crescent wand may be used as a reference. This way is more vivid and complex than the three methods mentioned above.

Materials:

Disposable plastic gloves

Piece of thin card as a template for the crescent moon shape

1x 500g pk of Air Dry Modeling Clay

Bowl of lukewarm water

Hot Glue Gun

1x tube of Iridescent Medium

1x tube of Acrylic Paint (Pink)

1x tube of Acrylic Paint (Metallic Gold)

Small Red Gems

sailor moon wand materials

Click here to read the Process.

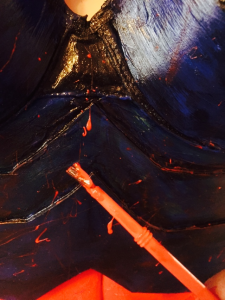
Finished product shown below.

crescent wand

Method Five (Adapted from the article by onesky-1destiny)

This is to make the extended version of Sailor Moon’s Moon Stick as seen in the first arc of the manga. You can use this tutorial to make the traditional hand sized Moon Stick by using shorter/thinner PVC and making slightly different details.

Materials:
a. (3-4) 2oz packs yellow polymer clay (I’m using crastsmart brand from Michaels)
b. (1-2) 2oz packs white polymer clay
c. (1) small bottle pink acrylic paint (I’m using Apple Barrel in Bright Magenta 20591)
d. (1) small bottle yellow acrylic paint (I’m using Apple Barrel in Yellow 20502)
e. (1) small bottle pearly white acrylic paint (I’m using FolkArt in Metallic Pearl White 659)
f. (1) can pink spray paint (I’m using Krylon in Watermelon) (OPTIONAL way of painting)
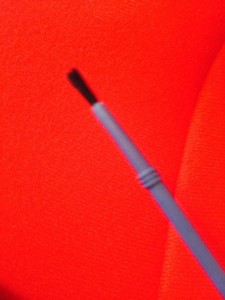
g. (5-6) feet of 3/4″ in PVC pipe, cut into two sections (I’m 5’4″ and I’m using about 66″, or 5’6″ worth of pipe)
h. (1) 3/4″ PVC pipe coupling (used to connect the two pieces)
i. (2) 3/4″ PVC end caps
j. (1) 30mm or 40mm faceted crystal sphere (I buy mine here: [link])
size is up to you, 30mm is a bit bigger than a quarter I use this size for the regular size Moon Stick, and 40mm is about the size of a golf ball which I use for the tall Moon Stick

Click here to read the process.

Tutorial__Sailor_Moon__s_Wand_by_onesky_1destiny

Hope this article is helpful. Get started and make your own Sailor Moon Cosplay Wand!

Couple Cosplay – Are you willing to be my master?

Under this contract, you are no longer a passer-by to me but the most important person in my life. Of the multifarious contract relationships in animes, some are touching, some are funny. Do you want to be a master or a servent? Here’re some couple cosplay ideas for you and your friend.
Ciel Phantomhive and Sebastian Michaelis from Black Butler

Sebastian Michaelis, Ciel Phantomhive Cosplay

Cosplayer LALAax
Attack from human makes no effect to him. He is Sebastian, who is a devil and only takes orders from his master Ciel before Ciel reaches his own purpose of revenge. After Ciel’s revenge done, he must give his soul to Sebastian. IOW, his soul will forever belong to the black butler Sebastian.

Contract Mark: a magic matrix on Sebastian’s left hand and Ciel’s blinder on his right eye.

Kuroshitsuji - Ciel & Sebastian

Louise Valliere and Hiraga Saito from The Familiar of Zero

Louise & Saito Hiraga from The Familiar of Zero
I unexpectedly become a pet (no, a magic)!?
The girl Louise, a magic school’s second grade student, had summoned Hiraga as the magic who would serve her. Louise asked Hiraga to sign a contract with her.
Strange words emerged from the back of his hand and he became the exclusive magic to Louise. He had no way but to live with Louise and to find out the ways to go back to his original world.

Rin Tohsaka and Archer from Fate Stay Night

Rin Tohsaka and Archer

Cosplayer 間桐君棘

Rin Tohsaka is one of the three main heroines of Fate/stay night who acts as the Master of Archer in the Fifth Holy Grail War. She’s got the command spell on her right hand.
Mirotic of Rin when summoning Archer:
Announcement!
Your soul belongs to me. Your fate gives you the sword.
Conform to the Holy Grail to response and make an oath. You are the one who achieve all the benevolence. You are the one who transmit all the sins.

C.C and Lelouch from Code Geass

C.C and Lelouch from Code Geass

Cosplayer 沐晓
C.C and Lelouch make a contract about energy grant, which means that C.C must grant the energy of Geass to Lelouch to help him reach his purpose. In return, he must help C.C complete one thing.
About the energy: Lelouch’s Geass manifests itself as “the power of absolute obedience,” which allows him to plant commands within a person’s mind upon direct eye contact. He is granted this ability through his contract with C.C.

The contract mark in on C.C’s forehead and in Lelouch’s eyes.

C.C.

Cosplayer  雏菊叔叔

Lelouch

Cosplayer 卤蛋蛋

Read More

10 Signs You’re Addicted To Cosplay

Cosplay is addicting! You get inspired and go crazy at it. But, how can you tell if you’re a true Cosplay Fanatic? Here are 10 signs you’re addicted to cosplay.

1. When watching any show you are constanly thinking “I can cosplay that.”

elsa

2. You walk into any apparel store and start planning what can be used for “casual cosplays.”

tumblr_lzvx03wDNZ1qj9wxoo1_400

3. Your savings is just another word for cosplay expenses.

cash-mony-cosplay-final

4. The employees at Joannes all know you by name.

5. You have more Cosplays than clothes.

buyingvsmaking

6. All Plans are second to cos-plans.

7. You have every wig but the one you need for your new cosplay

P4097991

8. Friends gather at your place for projects because they know you will know exactly what to do.

friendsanimegroup

9. No one knows all nighters like you do.

Fotolia_woman-crying-depression1

10. You are incredibly creative and love making something fictional come to life!

How to Weather and Add Blood Effects to Cosplay Armor and Props Tutorial

BeforeandAfterHello everyone!! Today I’m going to teach you how to Weather and add special blood effects to your Cosplay Props and Armor. To give you a short and simple definition/background on the word weathering. Weathering has been used for aging certain items to give them an “Older effect”, and while also bringing a lot of definition to it. I decided to do this tutorial on Weathering and adding Blood Effects to props and armor because in the past I had no clue and asked myself over and over and over again. “How was I suppose to weather?”, “What do I even use for weathering?” (What Weathering even was xP I know now though!), “how would I add blood?“, “Is there such a thing as too much blood?”. I never found a tutorial that went in depth in weathering or doing these types of effects. Which, led to me teaching myself on my own and also watching clips where people described how they weathered and added blood to their armor and props. This Thus, led me to choosing the next perfect tutorial for all of you! (Yayyyyyy let have some fun okay?~). Hehe, So without further a do lets begin the tutorial ^~^1stpic

First Lets go over your materials you will need!:

  • Black Paint
  • Red Paint
  • Two Brushes
  • Your hands (I’ll explain this xD)
  • The prop that you would like to Weather and/or add Blood to
  • Clothes you don’t mind messing up (It’s going to get a little crazy!)

1. Now the first thing you need to do is grab your Prop/Armor and check to make sure you have painted and primed it with the main colors that you desire. I used my handy Mod Podge to seal the armor over and over after painting each layer (Tip: I found out that actually using the Fabric Mod Podge on Craft foam actually helps absorb the colors really well! especially fabric paint!) Before even going and starting to weather, I ask that you get an idea of how old you would want your prop to look (Don’t want it to look older than needed! However, by all means go crazy with it!)

2ndPic

2. Once you have your idea grab your first brush and black paint! The black paint is to help you with the weathering. When I started with the weathering I first went and put paint in every edge that my brush could reach to. For example like above  I outlined the parts of my armor especially in the sharp points! I grabbed a simple Brush and started outlining everything (sorry I forgot the pic for this part! But don’t worry, you’re not missing anything!)

3rdpic


3. After Outlining your Prop/Armor this is when thing start getting a little wild! You can use your bare hand in this part if you would like, but where you outlined your parts take your index finger and start rubbing the paint in all directions (do it as though you’re spreading butter on some bread :3) You must hurry though, because the paint can dry quickly! But even then it will still help with making your Prop/Armor become more distinct. After doing this I found a way that you could quickly do this in the more bigger parts on your Prop/Armor!. I took paint a dabbed it a few time in one big area and then I rubbed that are completely with my hand. Below is a picture of how I dabbed the paint around. The more paint you use the darker it will get and mesh together so please be considerate of that (Remember once the paint goes down its hard to correct >//.//<)

44. Repeat the steps above till you are satisfied with how everything looks. After you have darkened everything the way you wanted, your prop/Armor should distinctively looked differently than how it did before. My Armor came out this way after I had gone and Weathered everything ^~^55. Wooooooo After completing your weathering its time to Add Blood~(This is not required but is another short extension of this tutorial) I was really nervous when I decided to add blood to this piece (Its so pretty *^*) but in the end it came out really well. The first thing you need to do is grab a new brush and some red paint! When you have the paint on the brush (Again your hands will get dirty xD) Pull back on the brush hairs and lightly let the paint flick onto the desired Prop/Armor. This creates a splatter effect of actual blood as it dries. I did alternate between using the splatter effect and also using the same technique I did with the weathering technique (That also works really well!) 66. After Splattering blood to your hearts content (Don’t enjoy it too much 😉 lol) The Prop/Armor just needs to dry and you’re all done! Congratulations!! Below is the finishing Picture of what my armor looked like in the end :3

7I really hope this tutorial was useful to you, even though I wrote this for Props and Armor its not limited to just that. I would like to thank you for reading this tutorial. I love being able to pass on what I learn on to all of you. If any of you were wondering about what materials I made the armor from, I made the base of the breastplates from a bra and then foam fabricated everything with regular craft foam. The paint I used was actually fabric paint rather than normal acrylic paint and I sealed everything with Fabric Mod Podge. However, If you use Acrylic paint I believe it will do just the same thing (xD). This was a really fun tutorial that I enjoyed doing very much! So as always everyone Stay Positive, Stay Healthy, and Stay Creative.

How to Start Your First Cosplay

Now you may be thinking, wow! I love seeing cosplayers and I love this anime, I really want to cosplay from it!! So here are some tips to get started on choosing and creating your first cosplay.

-Pick your favorite anime:
Choose your most favorite anime in the whole wide world! It can be a really old one or a new one, regardless, there will be somebody who says ‘Hey, I know where you’re from!’.

-Pick a character you like, even your favorite:
While some people don’t like to cosplay their favorite character, I personally love it! There’s nothing more exciting to me than to be able to cosplay my all time favorite at a convention and have someone tell me that I look the way they imagine the character to look in real life.

-Start with a simple cosplay:
While a more intricate cosplay is always nice, those are best saved for a second or third cosplay, once you have a little more experience. Try shopping locally and piecing together a cosplay out of parts you can find at a thrift store or things you already have. Try cosplays like Misty or Ash from Pokemon, Finn or Fionna from Adventure Time, or L or Misa Amane from Death Note!

-Sewing:
If you or someone you know sews, try asking them or sewing yourself a simple costume out of a store bought or printed out pattern. You can also try adding simple little details like lace or sequins.

-Wig:
Invest in a wig that matches your character’s hair but if your hair matches the color or length, you can use your own hair for your first cosplay by styling it or using a temporary hair dye if you want to match an odd color (and if your parents say it’s okay). If anything, a wig would work better because you wouldn’t have to mess with your own hair and they are usually fairly cheap on sites like eBay or Amazon and even on Miccostumes!!

Read More