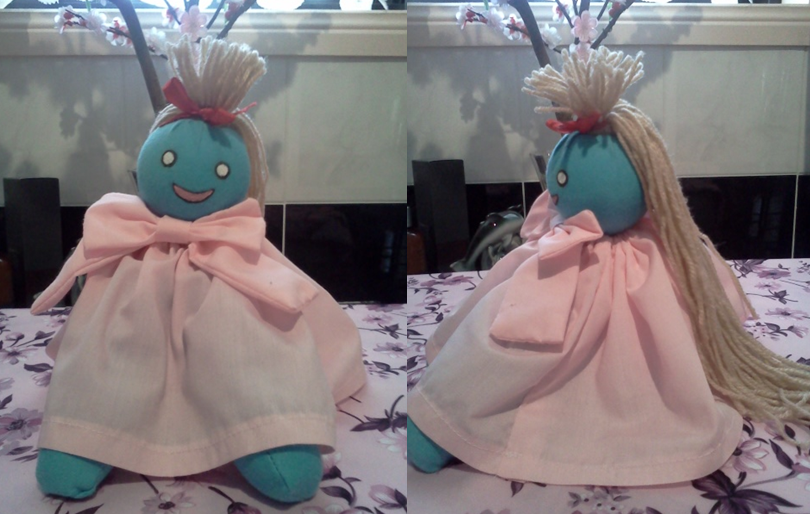
No Break Xerxes cosplay is complete without his doll Emily! This tutorial will show you how to make a quick and cheap Emily doll which you can clip onto your clothes to complete the Break look.
Check out my other cosplay accessories at http://mixiao.deviantart.com/
What you need:
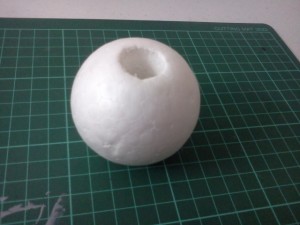
- Foam Ball (my ball was 5-6cm diameter) – this will be the head of our doll.
- Foam Bell shape – body – since Christmas is coming up I’m sure you will be able to find a foam bell at craft stores.
- Blue stretch fabric – has to stretch so our Emily’s Head doesn’t have creases on it.
- Light pink fabric – not stretch, just regular cheap fabric.
- Brown wool
- Red ribbon
- One sheet of Felt – any colour
- 2 alligator clips
- White and pink paint
- Black fabric marker
- Polyester stuffing
- Hot glue
- A thin wooden stick.
Steps:
- Using a pen/pencil/long pointed object, make a hole right though the foam ball. Make sure the hole goes directed though the centre of the ball and it is around 1cm in width.
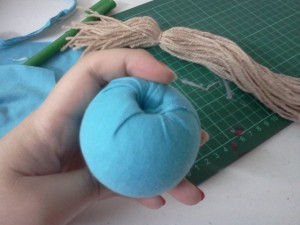
- Cut out a decent amount of blue stretch fabric enough to cover the whole ball and a little bit more.
- Wrap the fabric around the ball, tucking in the excess into the hole we just created. Make sure to not have many creases.
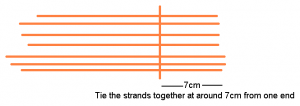
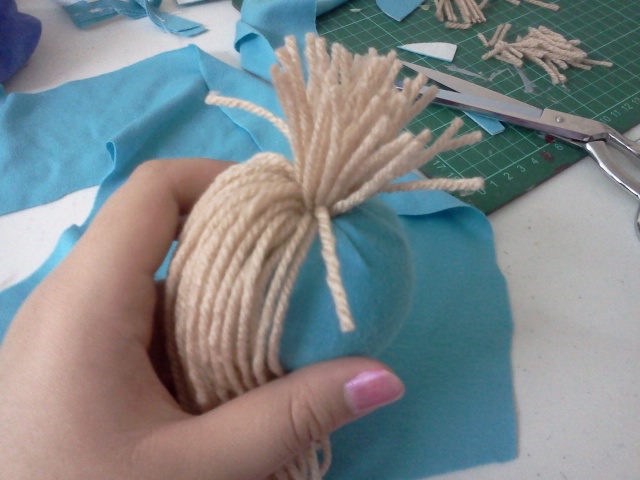
- Cut out many stands of the wool for hair, the lengths of the strands do not have to be the same. and tie all the stands together using one of the wool stands.
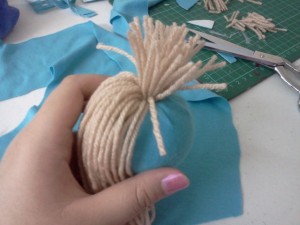
- Fold the hair together at the point where you tied a knot, put hot glue into one of the ends of the ball and place the folded part into the hole, cut the top hair all the same length. (use a pencil to help push the hair in) should look like this:
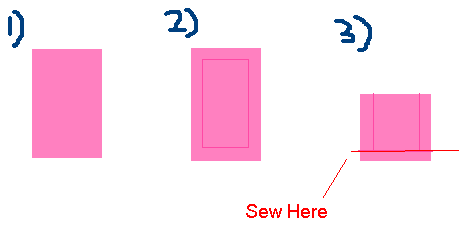
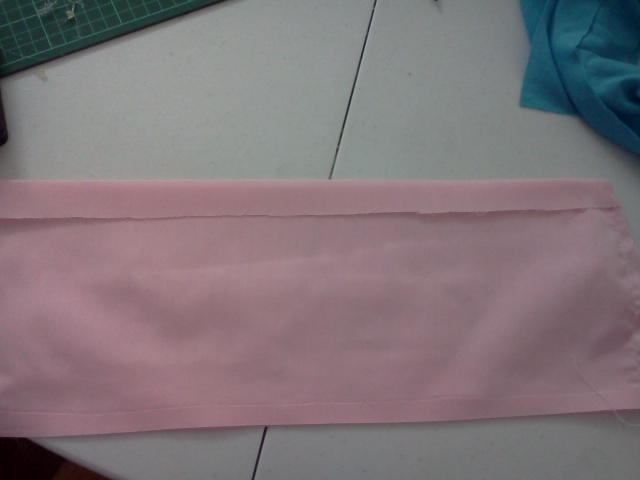
- Cut out 2 pieces of 20cmx40cm from the pink fabric. Lay both pieces on top of each other and sew the shorter sides.
- Fold in 1cm and iron this down to make a hem. Do this for both pieces but only for one side. The other side, fold in 2cm and iron down.

- Now sew the hems, for the 2cm side, leave a small gap, don’t close off the stitching.Thread ribbon through the 2cm hem. Now leave this aside.
- Grab your Emily head and wooden stick, put some hot glue into the other end of the head and place the wooden stick into the hole.
- Make a hole in your foam bell, pour hot glue into the hole and place the wooden stick with the head into the hole. Make sure the head sits nicely ontop of the bell. The stick does not have to be long as the bell, it can be shorter.
- Put hot glue onto the bottom of the foam bell and then place it on a sheet of felt. Cut off the excess.
- Cut out 4 15cmx4cm rectangles from the blue fabric. Place 2 pieces on top of each other and sew around(curve the ends for arms) and repeat for other arm. Stuff the arms with the toy stuffing and sew the ends off.
- Hot glue the 2 arms on the foam bell right under Emily’s head.
- Now for the bow. cut out a 10cmx8cm rectangle, fold this in half (fold the 8cm side in half)and sew around, leaving a small gap, turn the rectangle inside out and iron it out. Cut out a 20cmx8cm rectangle, fold in half and sew it the same way. Cut out a small strip of the pink fabric 3cmx 4cm, hem the sides, fold this in half and sew the side opposite to the fold.[Image for steps below]
- Turn this inside out, and put the 2 pink strips you just sewed though it then thread though the back of the bow with some ribbon.
- NOW! here’s where it all comes together, Grab your bow, tied it around Emily’s neck and tie 2 knots at the back. Cut off excess ribbon. Place the pink “”skirt/dress” we made in step 8 over the ribbon knot but under the bow. Pull the dress’s ribbons together like a drawstring. Securely tie a knot, and cut off excess ribbon.
- Paint on 2 white circles for eyes, a pink creepy smile wait to dry and trace over the edges of these shape with your black fabric marker.
- Grab some of the red ribbon scraps, tie a bow on the top of Emily’s hair.
- Turn Emily upside down and hot glue the 2 alligator clips of opposite sides of the bell.

And we are done! There are lots of steps but it doesn’t take that long at all. I hope you enjoyed the tutorial!
Thanks so much! i havent been able to find a tutorial, and i wanted to be break for halloween! Thanks so much!