Sometimes you want to make bows that you don’t have to tie every time you wear a costume. Or you need them to be attached permanently, so I’ve come up with a way to make them and now will share that with you.
Step 1:

Decide what size you want the bow to be. The one I was making in this tutorial goes on the back of a tailcoat, so I decided it would be 10″x6″, so I cut two pieces 11″x7″. If you are working with a flimsy fabric, you might want to interface the bow pieces. I was working with a fairly sturdy shantung, so I didn’t bother with interfacing, but for other bows I’ve made in the past I have interfaced them.
Step 2:

Stitch around one long edge and both side edges completely with a 1/2″ seam. One the remaining long side stitch from each corner to the center, leaving about an inch open.
Step 3:

Trim the seams and clip the corners. I usually don’t trim the seam area where I’ve left the opening because it makes it easier for the next step.
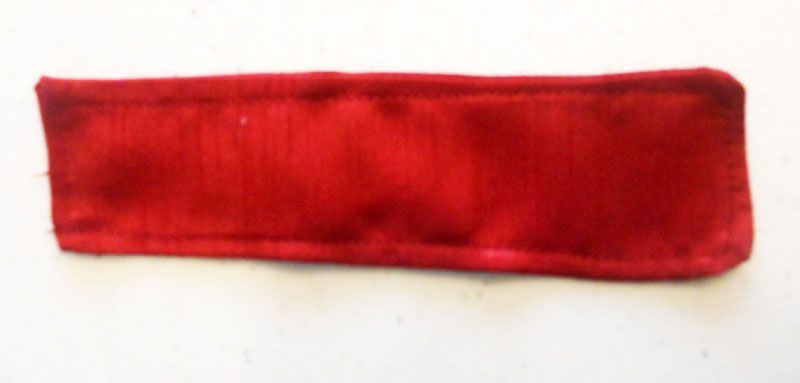
Step 4: 
Turn your piece right side out, folding the seam allowance of the opening to the inside and press the whole thing. Then top stitch as close to the edge as you can.
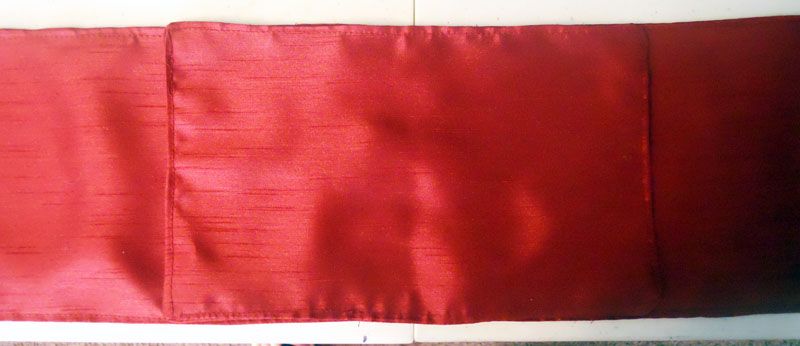
Step 5:
Time to make your knot. I cut two pieces about 7″x3″ to fit my bow. I stitched it together with a 1/2″ seam along one short end and both long sides. Then I turned it right side out, turned the short open end to the inside, pressed, and top stitched just like the bow.
Step 6:

This next step is optional, depending on what type of bow you are making. This is the step to make the tails for the bow. For the coat I’m adding this to, I need some pretty long tails. I wanted each one to be roughly 25″ long from the center of the bow, so I cut two strips of fabric 52″x7″. Then I stitched it together just like the bow part, turned it and top stitched it.
Step 7:
Now it’s time to join the pieces together. Find the center of your bow and tails and lay them together. If you are making a bow without tails, just find the center of the bow and go to the next step. If you are doing one with tails, lay the bow and tail together with the centers matching.
Step 8:

Grab your bow and tails at the center and gather them. Wrap the knot part around the bow and tails as tight as you want, making sure that the end is in the back when you are done. Pin it in place and hand stitch the knot into place.
Attach your bow:
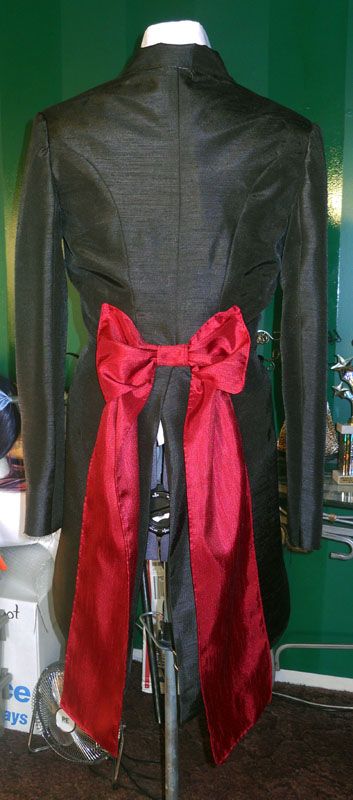
Position your bow wherever you need it and hand stitch it place.
Other bows made using this method:

This one is very similar to the one from the tutorial except the fabric was lighter weight, so it was interfaced.

Bows with shorter tails. These were made for Sailor Neptune from Sailor Moon. Since the bows needed to be very stiff, I interfaced the bow and tails both so that they wouldn’t sag.

And finally, the method without the tails.
Hope this was helpful to anyone needing to make bows.